


Today, I will explain how to put that transparent picture on a different background which is:

So, Get readdy peeoopppppleee!
1. Open gimp!
2. Go to file> Open> and open a picture of the background you want to put the transparent picture on. (Search for the location)

3. Then, If you check your layers, I'm guessing you can see the background.

4. Now create a new layer, By right-clicking on your layers panel and the "New layer". (Ps. If you cannot see your layers, On the top, Click windows> dockable dialogues> layers.)
5. Now drag the transparent picture to gimp, Or open it in file> open> then open your transparent picture.
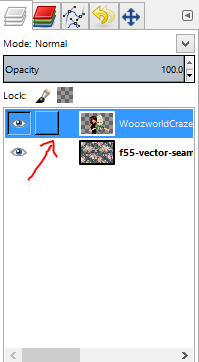
6. The transparent picture will appear on the gimp place, Now use the moving tool and move the picture to your desired place.

7. After you have moved your transparent picture to the place you like it best on your ready to save.

8. Go to file> Export as> save as PNG file.

~Sinz

No comments:
Post a Comment